Comparison of Modes
All modes in AKVIS Enhancer are designed to improve images. All modes work with areas in light and shadow, to reveal previously obscure details.
"Then why do we need all these modes and why should we not just choose one and use it?" you ask.
Answer: The main goal is the same, correction, but the methods used and the results are quite different.
| |
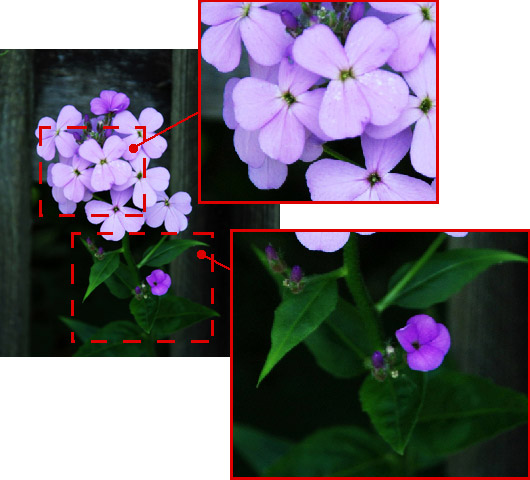
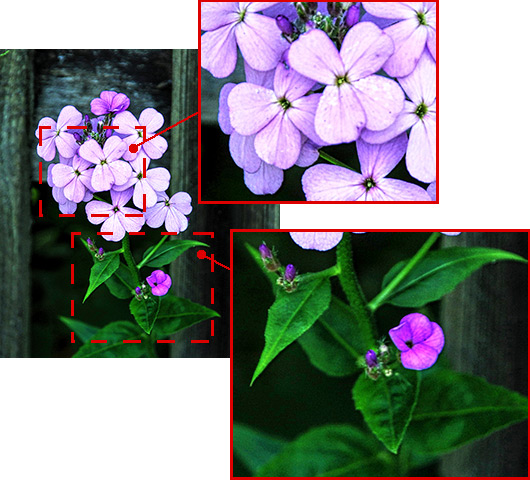
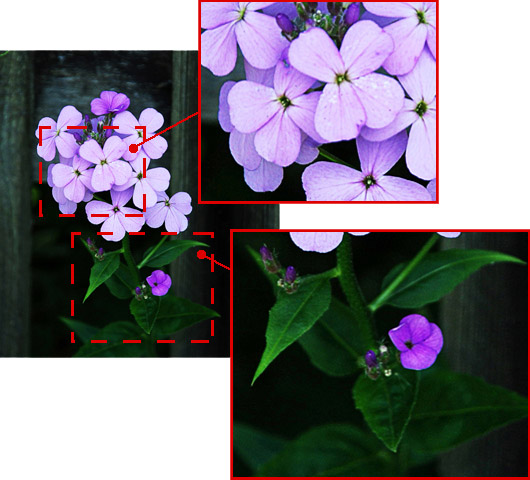
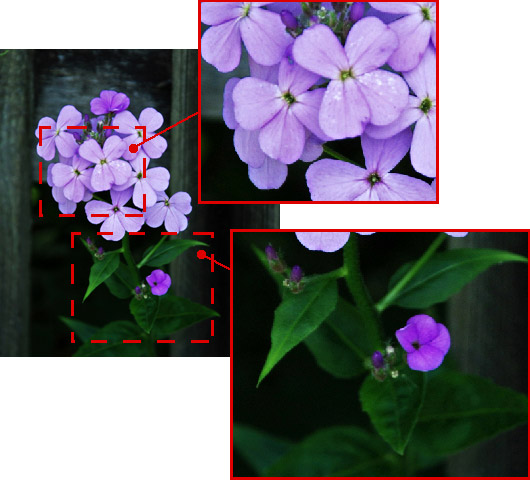
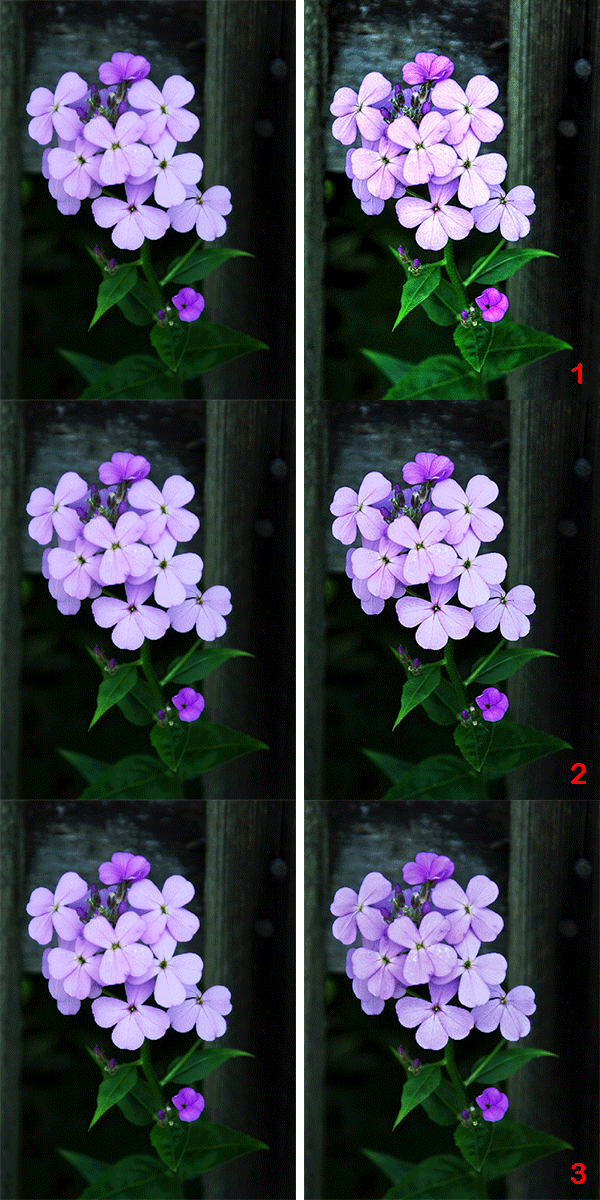
| Original Image | Result: 1 - Improve Detail mode 2 - Prepress Mode 3 - Tone Correction Mode |
Compare the results of the same image processed in different modes to see the difference:
Improve Detail mode strengthens the difference between pixels to reveal additional details hidden in an image. Details are its strong point. However, in revealing details it can also strengthen digital noise which is often present in photos.
Prepress mode increases the sharpness of borders and the contrast of the image, revealing objects. This mode is helpful when you want to adjust photos before printing or publishing in Web.
Tone Correction mode improves an image through correction of the brightness of the certain colors in the light and dark areas. Processing is not just performed in light and shadow, but also in the tints, that lets improving the image within the specified color range. Due to this it may lead to a lack of depth in an image compared to Improve Detail mode. It is best to use when making tone correction in certain areas of an image.
Resume:
In Improve Detail mode the entire image was processed. Details were revealed well on the stem and leaves, but the flower petals came out too light.
In Prepress mode the flower became sharper and more visible on the background.
In Tone Correction mode color restriction has been set. The color lilac was chosen (the predominant color of the petals) and only areas with this color were processed. Other areas - the stem, leaves, and the background - were left unchanged.
These results show that when comparing AKVIS Enhancer modes, one is not always superior to another. Different photos require different approaches at correction, so it is not possible to predict beforehand which mode would be more effective.
In many cases the modes complement one another. Applying changes with all modes can considerably improve the result. If you use all three modes on an image, we recommend starting from Improve Detail mode, saving the image, applying Tone Correction mode, saving, and, in the end, using Prepress mode for the final touches.
